Pancakes are well and good for a traditional breakfast, but sometimes you need variety in your life. That’s why we recommend you learn how to make crepes: they’re just as fast and easy and the batter keeps for a few days.
Confession: I’ve had more crepes than pancakes in my life, and I adore them. But I’ve only learned how to make them last year when I was visiting a friend in Greece. She taught me how to make crepes in her lovely kitchen in a stone house on an island. And we ate them with a lot of different homemade jams on her terrace, underneath a lemon tree. I swear, there was a big lemon hanging off a branch near my open hand. These are the kind of culinary experiences that I treasure.
But you don’t have to be in Greece under a lemon tree to enjoy a dish so versatile as the crepe. The neutral batter you make can serve as a delivering method for salty and sweet fillings. And you can use whatever fillings you want: from jams to chocolate spreads, from pieces of fruit to salty cheeses melted in the oven afterward. Before you boldly go on with these experimentations, let’s start off with the basics.
How to make crepes in 12 easy steps
1. Gather your ingredients
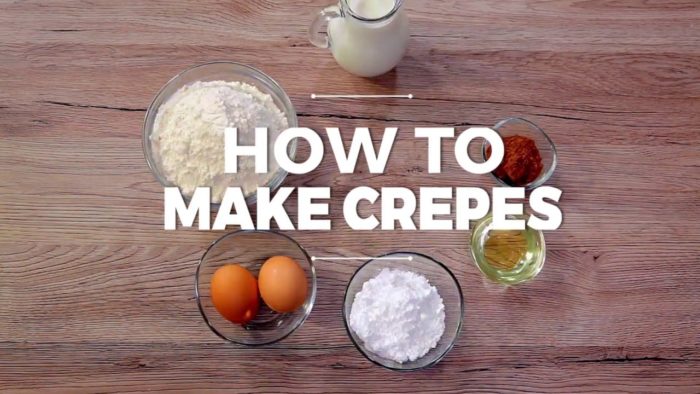
Ok, so what do you need to learn how to make crepes? One and a half cups of flour, two cups of milk (I know people who use sparkling water instead of milk, but I think they’re insane), two eggs, and a teaspoon of salt. This is the basis of the crepe, and you can add other things to the crepe mix if you’re so inclined. The thing is that crepes can have a variety of fillings, sweet or sour, so you can make main course crepes or dessert crepes. It’s up to you. You can add some sugar or powdered sugar, cocoa powder. You will also need some simple vegetable oil for the cooking of the crepes. But we’ll get to that soon enough.
As for equipment, you don’t need a special crepe pan. Just a small, nonstick, perhaps shallow pan. You will also need a whisk and a ladle, to measure out the batter you need for one crepe.
2. Mix the ingredients
Whisk the flour, eggs, milk, and salt together in a bowl, until the batter is smooth, without clumps of flour. The perfect consistency is watery. Add powdered sugar and cocoa powder to spice things up a bit.
3. Heat up the pan
Turn the stove to medium-high heat and heat up the pan.
4. Add some oil
It’s best to keep the oil in a small cup, near the stove. So pour a little bit of the oil in the pan, just to lightly coat it. Swish the pan to make sure that its whole surface has been covered in oil. If there’s any excess beyond the light coat, pour it back in the cup.
Now I haven’t even told you about the first time I tried to make crepes when I was a teenager, and I used too much oil. You don’t want that mess on your hands, believe me.
5. Pour some batter into the pan
Fill up the ladle with batter and pour it in the pan in a circle motion, because you want the batter to cover the whole bottom of the pan. You will get there by experimenting. You want the crepe to be thin and round, as big as your pan.
6. Swish the pan
Immediately after you pour the batter into the pan, swish it so that it covers the entire pan. As evenly as possible. If you need to add a bit more batter to cover bald spots, go ahead, but make it quick.
7. Flip
Let the crepe cook for a couple of minutes. It will start to bubble up on the upside. First, move the pan a little to make sure the crepe isn’t stuck. Then, as soon as the batter dried, it’s time to turn the crepe over. You can do that gently with a spatula, or you can just flip it in the air.
I was so afraid to do that and the first times I wasn’t able to do it because of panic! The secret is in the wrist movement: it has to be very confident like you’re willing that crepe into submission. And the secret also lies in realizing that if you mess it up once, it’s no big deal. You just move on to the other crepes. So confidence and a devil may care attitude is what helped me.
8. Cook on the other side
Let the crepe cook on the other side for a couple of minutes.
9. Remove from pan
This should be easy! Just tilt the pan slightly so that the crepe slides off the pan and into a plate.
10. Keep going
Keep making the crepes and stack them one on top of the other. That if you can bear to wait before spreading some chocolate spread, peanut butter, or jelly on them and eating them before all of them are done!
11. Add filling
I’ve seen this done a bunch of different ways, but here is how I like to do it. I spread my chosen filling on one side of the crepe. I love it when the filling starts spilling out when I eat the crepes, but if you don’t enjoy that thought, make sure to use a moderate amount of spread or filling.
12. Roll
Then I start to roll that side into the rest of the crepe until I have a nice, sweet, delicate roll on my hands.
There you have it: how to make crepes at home! Here are some extra crepes for you!


